
How to Import Metrics Data
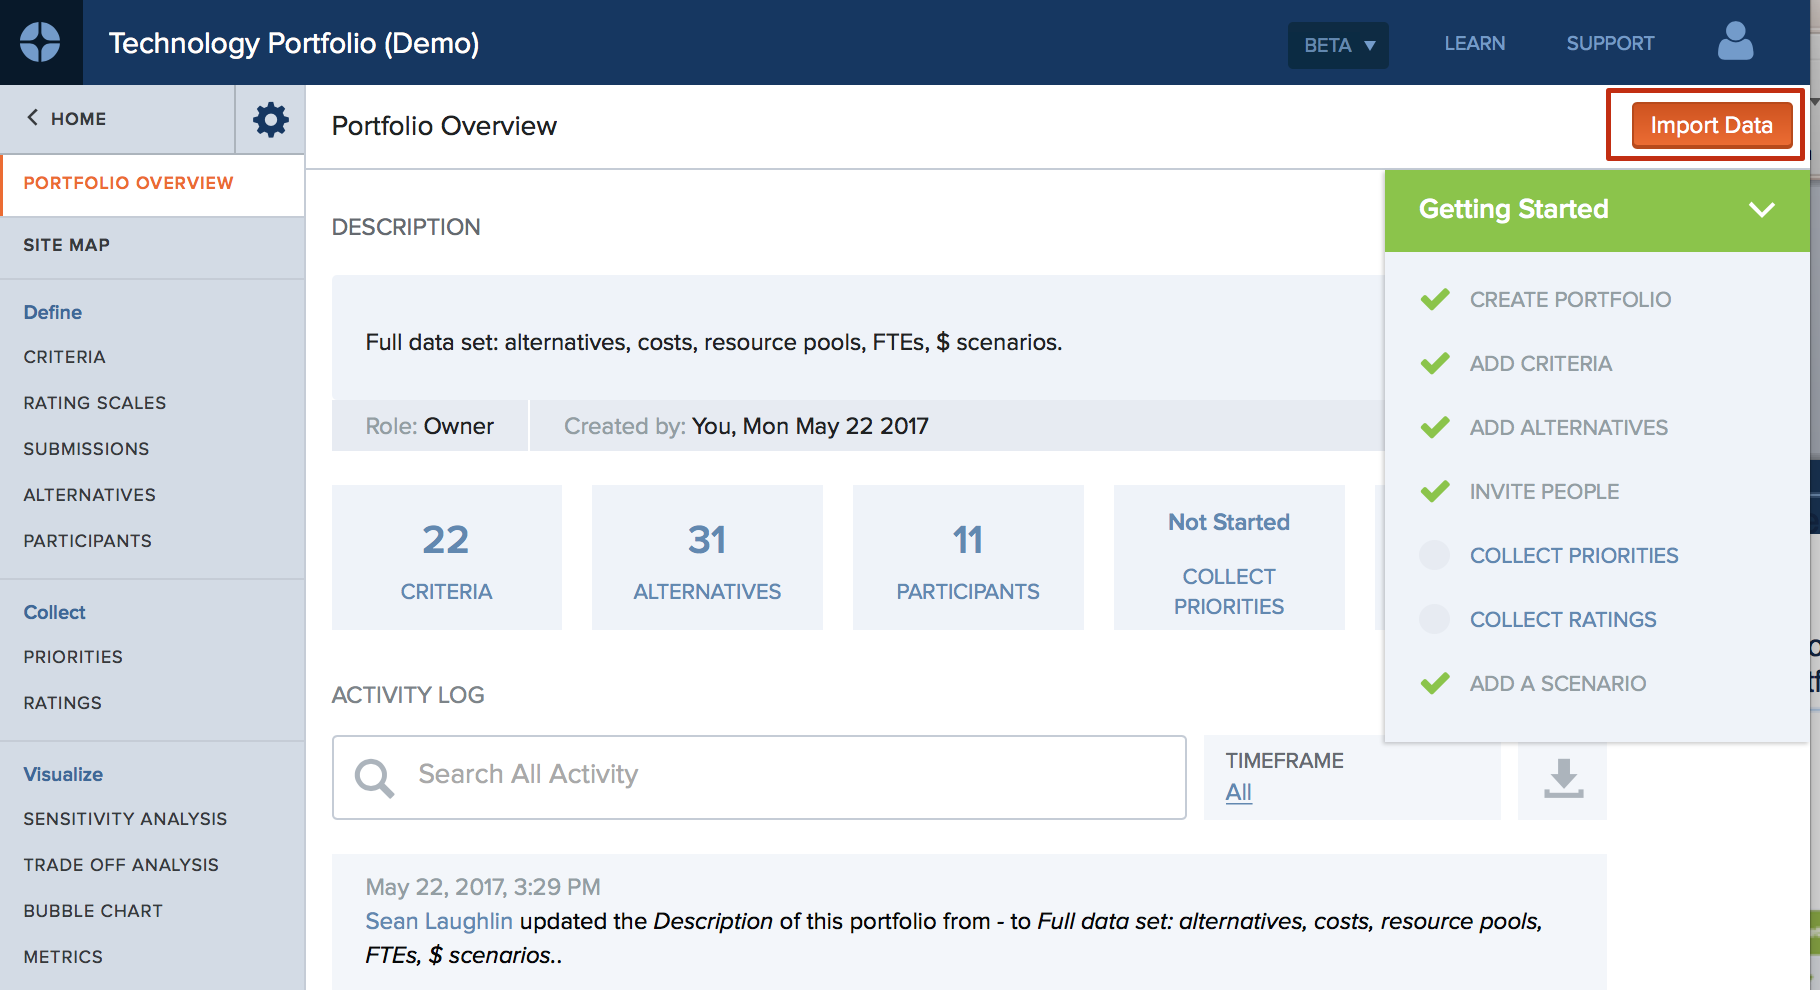
Launch the Import Wizard from the Portfolio Overview screen by clicking the Import Data button on the top right.
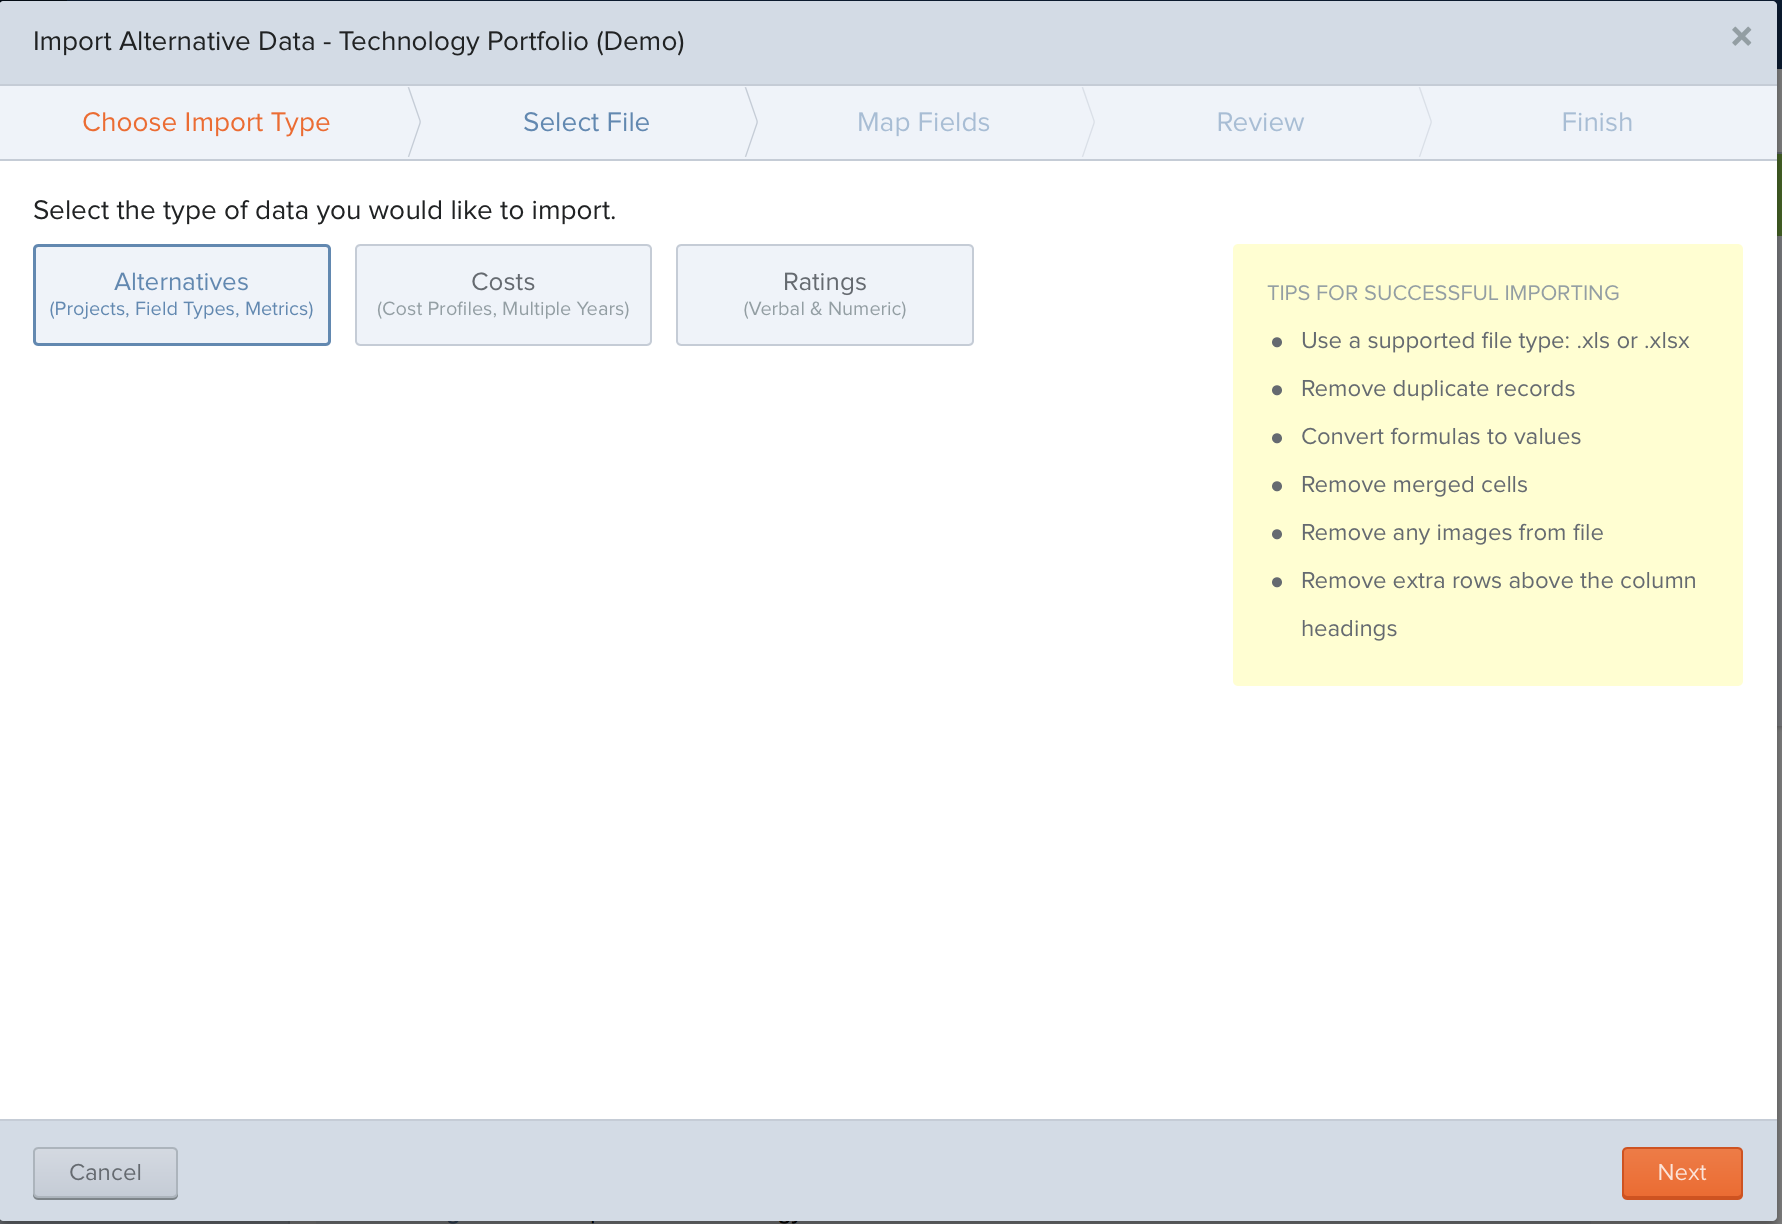
Select the “Alternatives” Tile from the first tab of the Wizard and click on the NEXT button.
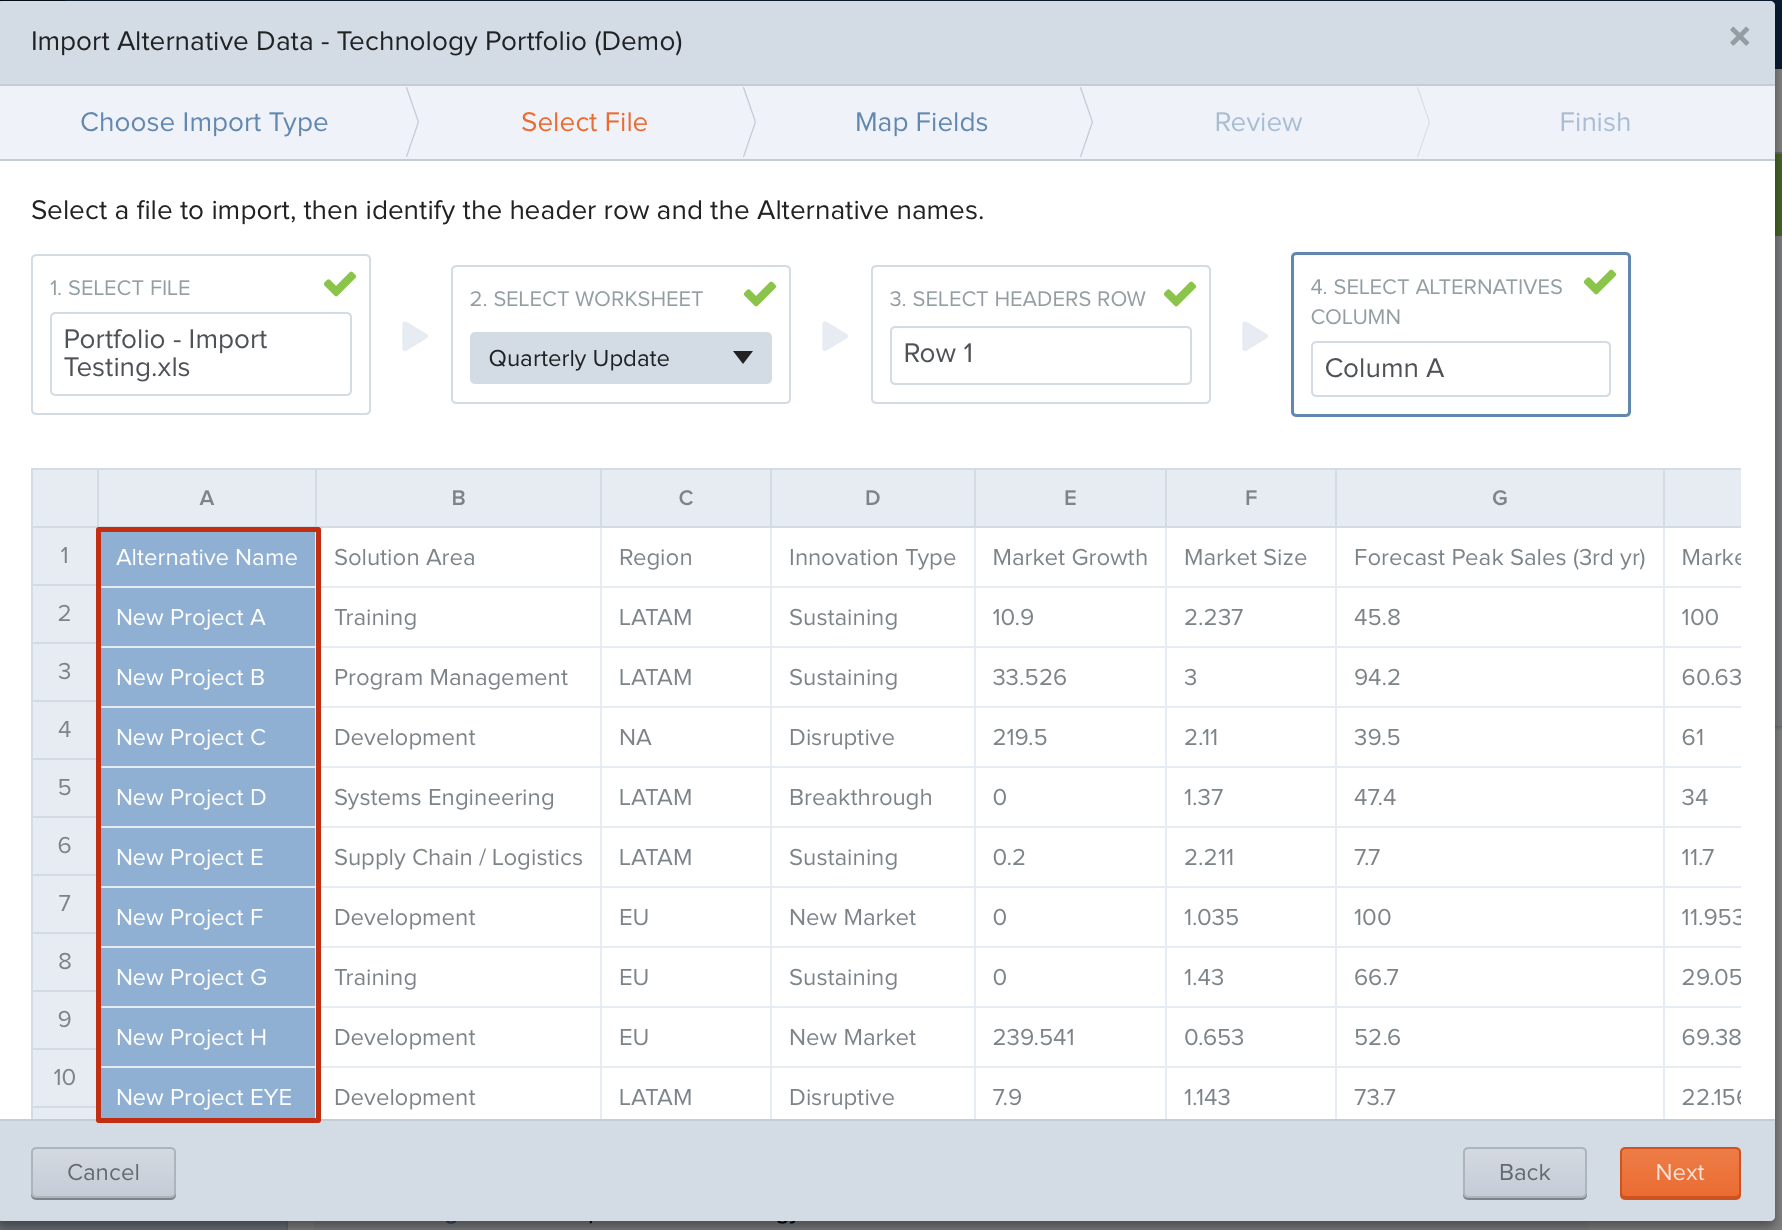
Step 1: Select the file you will be importing data from. Drag your file into the dotted lines or select to manually add your file (File Types .xls or .xlsx).
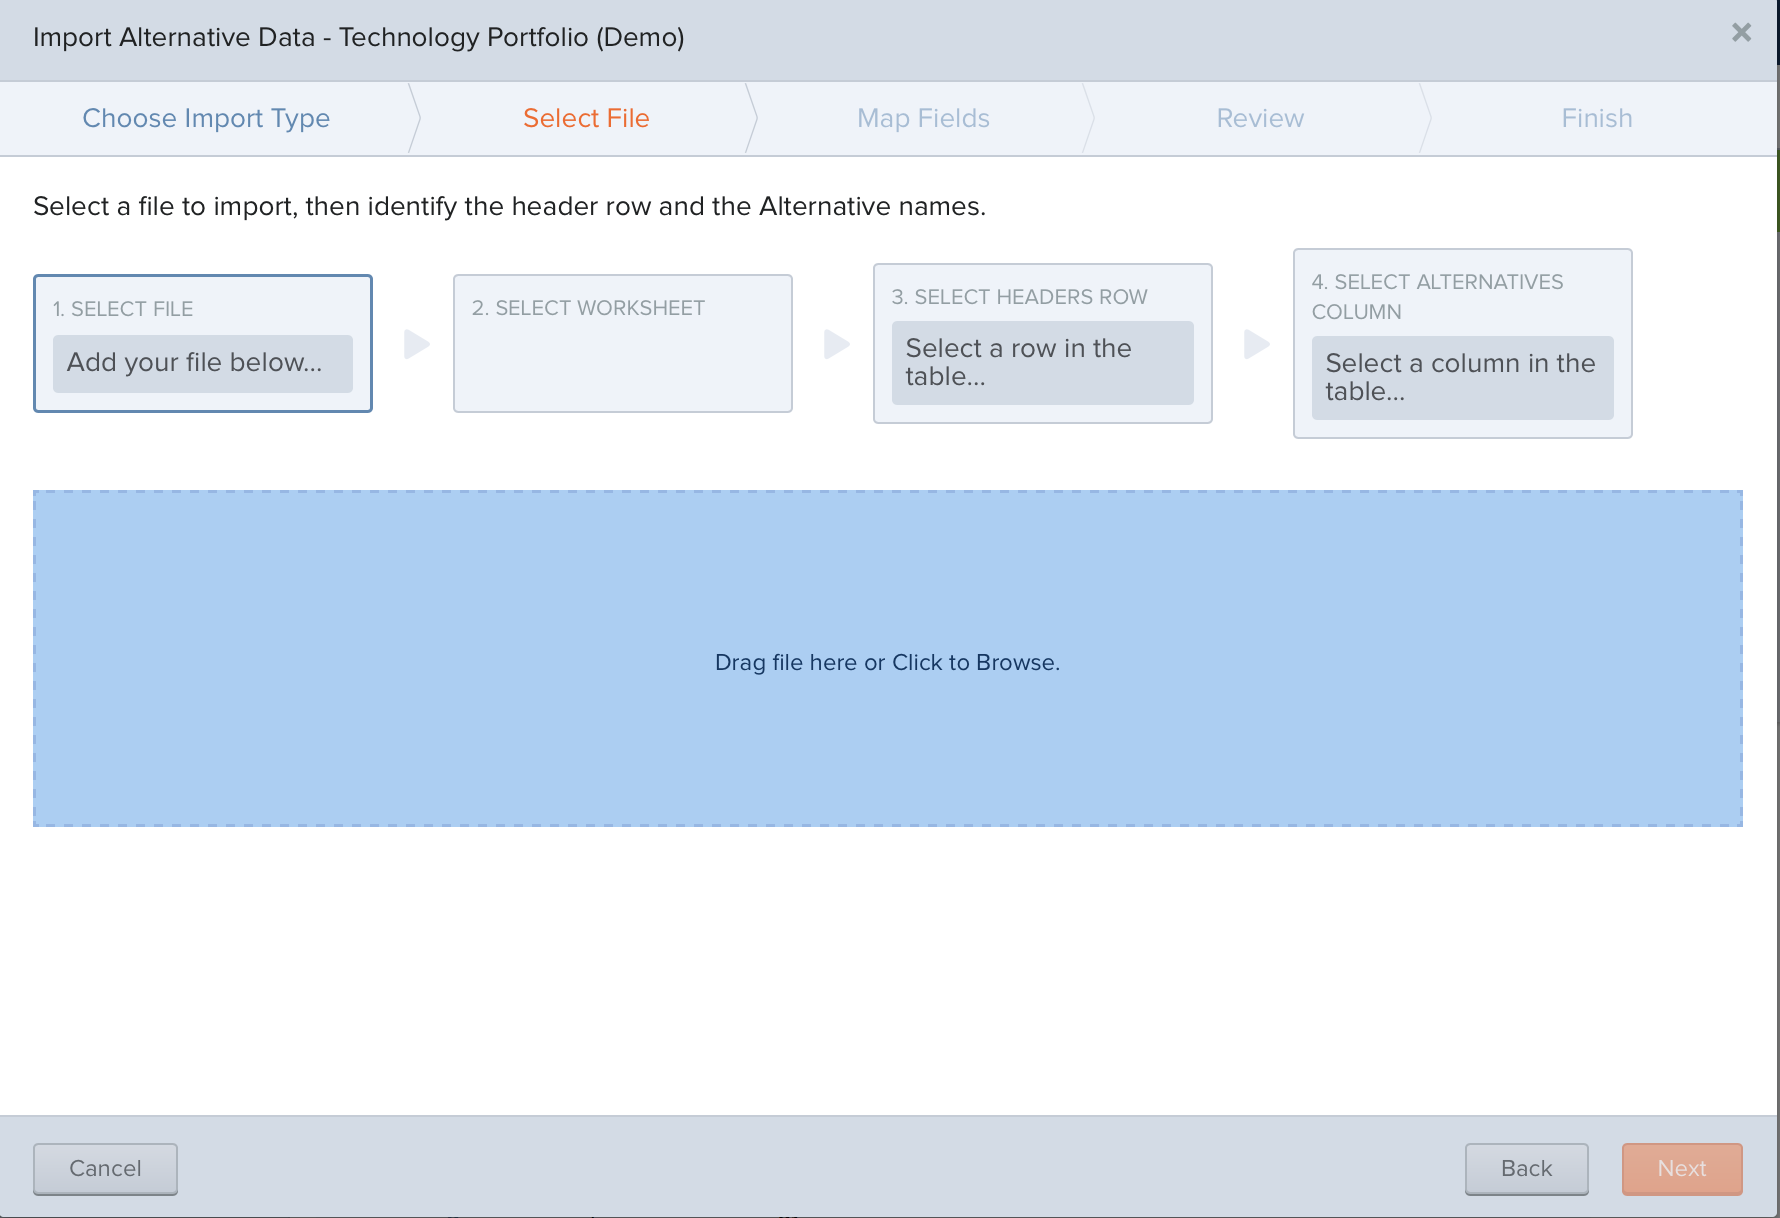
NOTE: To change your file, select the Step 1 tile, and drop another file or click within the dotted lines to manually select a new file.
Step 2: Use the dropdown to select the worksheet you want to import from
Step 3: Choose the row on the worksheet that contains your header information.
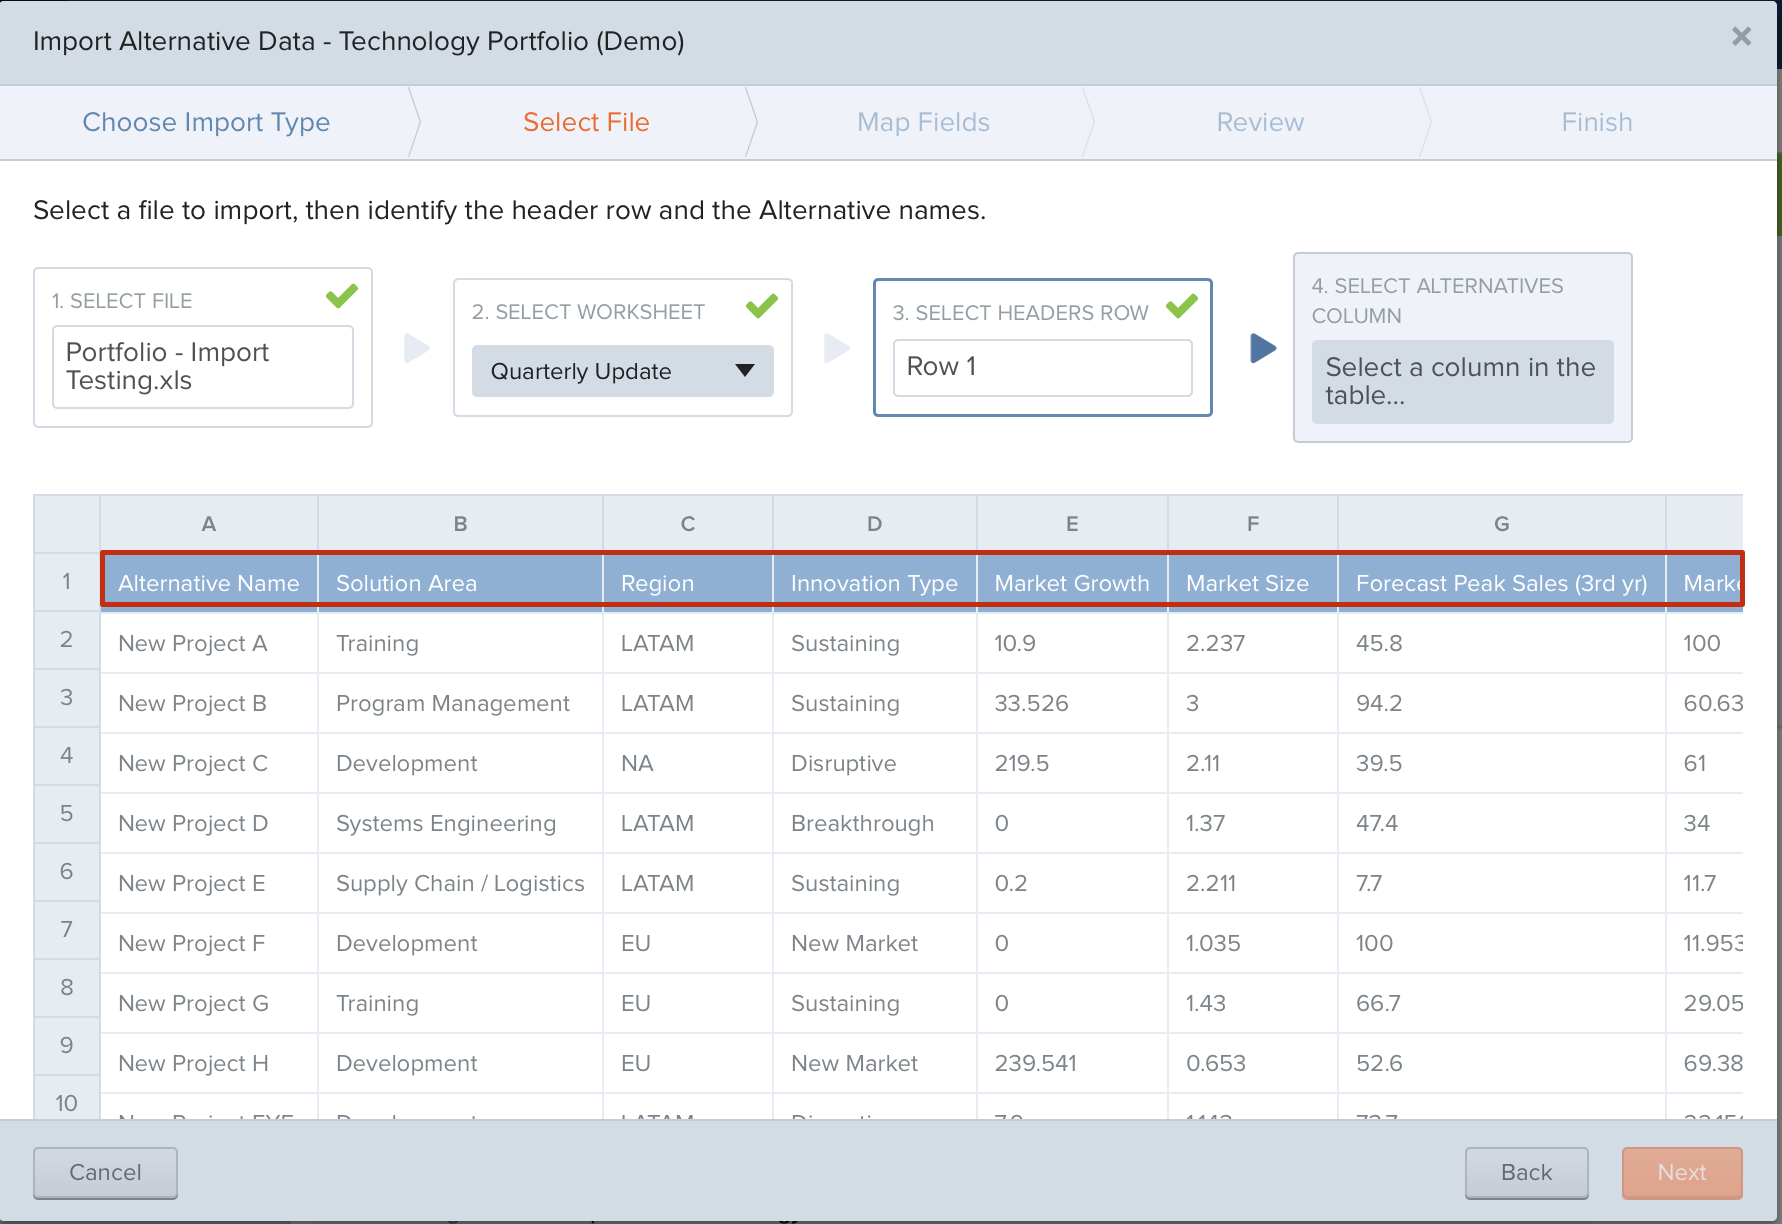
Step 4: Select the column that contains the Alternative Names. Then click the NEXT button to start mapping your fields.
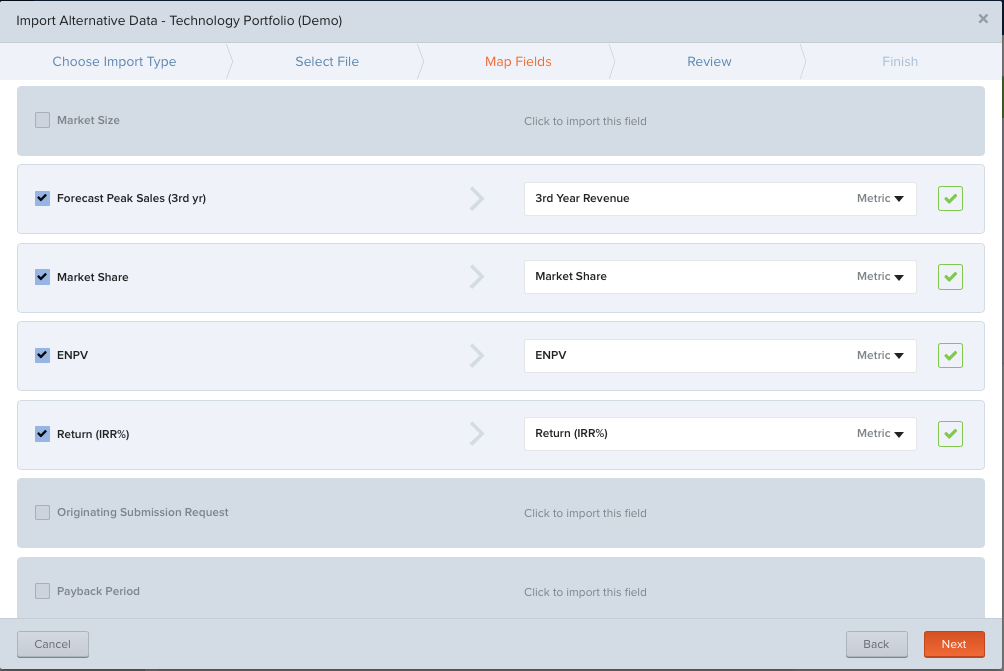
Now select the columns from your file that you want to import into the portfolio
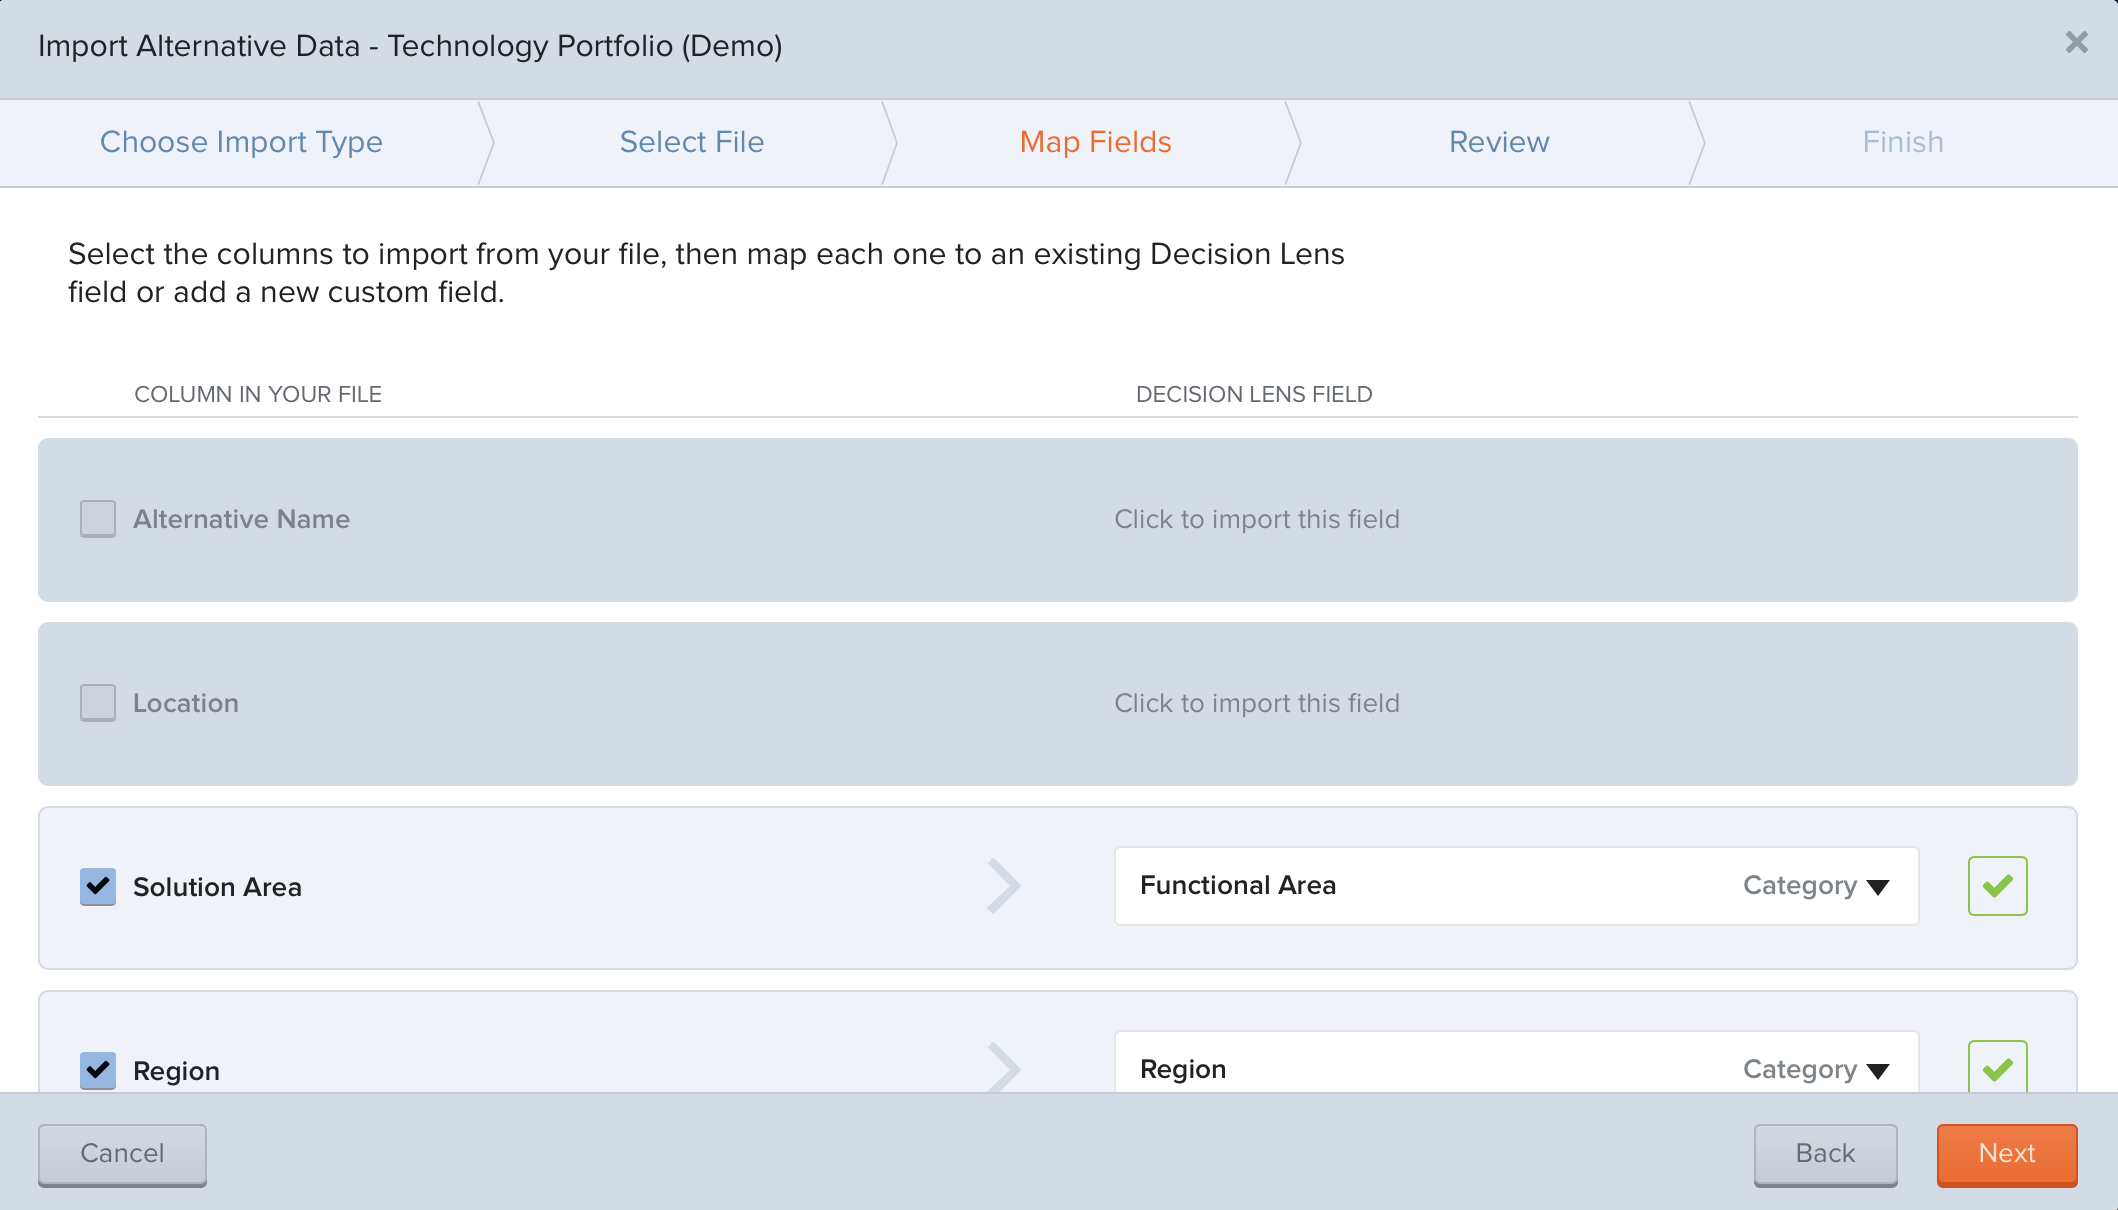
To only import Alternative Names, select the “Skip This Step” button from the Map Fields step
Click on the column you want to import and choose "Create a New Custom Field" from the drop down and select Metric. A dialog will appear to setup your metric.
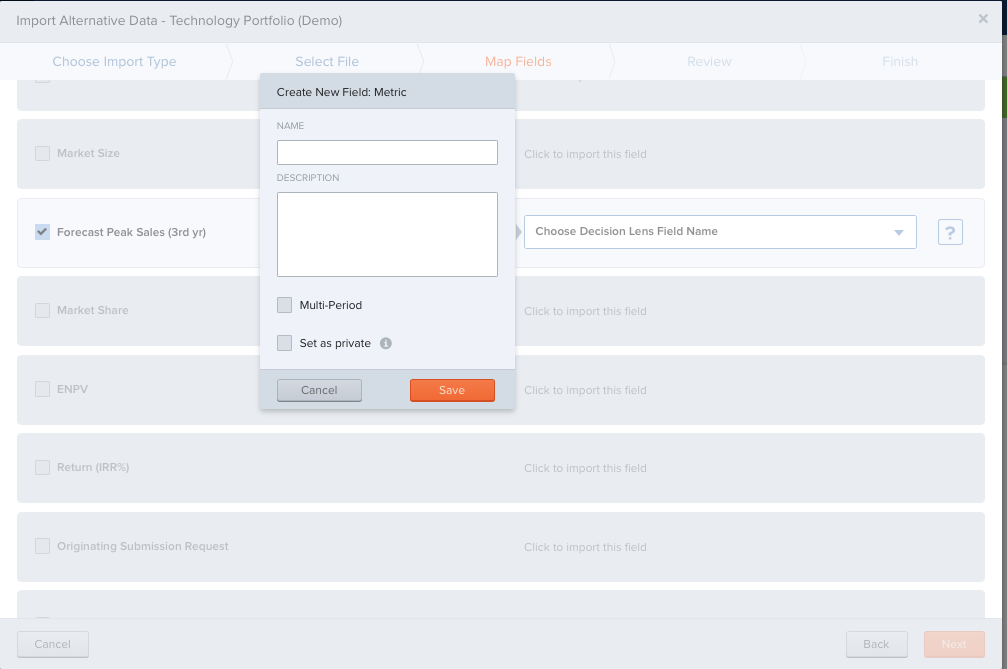
Options are available for Multi-Period metrics with Time Period displayed in Calendar Years, Fiscal Years, Quarters, or Months. Once setup is complete you can map additional metric fields and click the NEXT button.
You will see the Preview of the data you are about to import (headers, alternative names, & metrics)

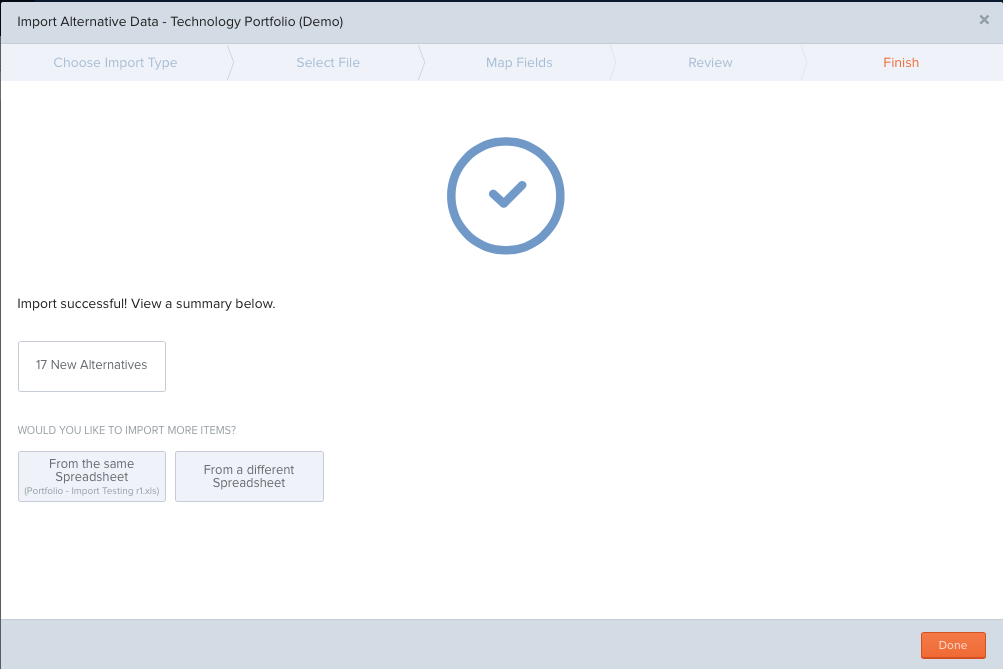
Click IMPORT NOW button to start the data transfer. When complete you will see the finish screen and can select to import again or click DONE button to return to your Portfolio View.
- Import Templates.xlsx (40 KB)